In this article we are going to take a look at DHTxx series sensors, which is used for measuring temperature and humidity, both the functionality is integrated into one module.
We are going to see their specification, so that you can choose best sensor for your project and finally we are going to interface it with arduino and read the values in serial monitor of arduino IDE software.
DHTxx consist of just two series DHT11 and DHT22. The major difference between them is their specification and cost. DHT11 is low end sensor and DHT22 is high end one. DHT22 is more expensive than DHT11, but low end is decent enough for hobby project unless you do some serious measurement with you project.
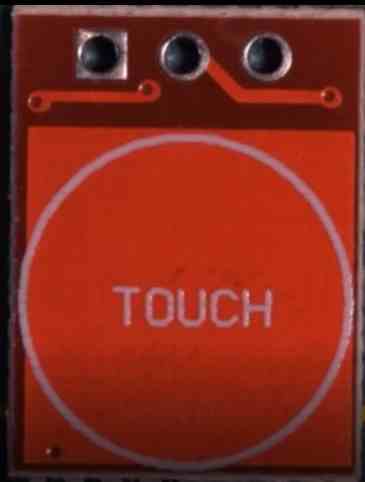
DHTxx is 4-pin device one of them is NC or no connection so, we are going to use just 3-pins. Two of them are supply pins and remaining one is output pin. The sensor may look simple, but it requires a library for handling it.
The sensor consists of a thermistor, a humidity sensing device and a microcontroller embedded in a module. Their specifications are as follows:
DHT11:
• Operating voltage range is 3 to 5V.
• Its maximum current consumption is 2.5mA.
• It can measure humidity ranging from 20% to 80% -/+ 5% accuracy.
• It can measure temperature ranging from 0 to 50 degree Celsius +/- 2% accuracy.
• It refreshes it value every one second.
• Its size is 15.5mm x 12mm x 5.5mm
DHT22:
• Operating voltage is 3 to 5V
• Its maximum current consumption is 2.5mA.
• It can measure humidity ranging from 0% to 100% 2-5 % accuracy.
• It can measure temperature ranging from -40 to +125 degree Celsius +/- 0.5% accuracy.
• It refreshes it value twice every one second.
• Its size is 15.1mm x 25mm x 7.7mm
From the above raw specifications you can choose which one is optimum for your project.

The data pin always should be connected with a pull-up resistor from 4.7K to 10K. The above illustrated sensor came with PCB with eliminated NC pin and with pull-up resistor. But some sensors come without those feature, without the pull-up resistor the readings send to arduino will be fatally error values.
Now we are going to interface DHT sensor with arduino. Before proceeding the project download the library file form the following link:
https://arduino-info.wikispaces.com/file/detail/DHT-lib.zip
You just need these four components: DHTxx sensor, arduino Uno, USB cable, and a PC.
Just insert the sensor on analog pins of the arduino as illustrated in prototype and dump the code to arduino, open the serial monitor and you can see the readings.
Author’s prototype:

//----------------------Program developed by R.Girish-------------//
#include <dht.h>
dht DHT;
#define DHTxxPIN A1
int p = A0;
int n = A2;
int ack;
int f;
void setup(){
  Serial.begin(9600);
  pinMode(p,OUTPUT);
  pinMode(n,OUTPUT);
}
void loop()
{
  digitalWrite(p,1);
  digitalWrite(n,0);
  ack=0;
  int chk = DHT.read11(DHTxxPIN);
  switch (chk)
  {
    case DHTLIB_ERROR_CONNECT:
        ack=1;
        break;
  }
  if(ack==0)
  {
  f=DHT.temperature*1.8+32;
  Serial.print("Temperature(°C) = ");
  Serial.println(DHT.temperature);
  Serial.print("Temperature(°F) = ");
  Serial.print(f);
  Serial.print("\n");
  Serial.print("Humidity(%) = ");
  Serial.println(DHT.humidity);
  Serial.print("\n");
  delay(500);
}
if(ack==1)
{
  Serial.print("NO DATA");
  Serial.print("\n\n");
  delay(500);
}
}
//----------------------Program developed by R.Girish-------------//
Serial monitor output:


Questions & Answers
THANKS,BRO. IN EGG INCUBATOR PROJECT
DHTLIB_ERROR_CONNECT’ was not declared in this scope. HOW CAN I SOLVE THIS ERROR.
Sorry Shaik, I tried a lot to find the solution, but I could not understand the reason….. actually I am an Arduino expert, and this code was generated by an external author.
hi, I am also getting error : DHTLIB_ERROR_CONNECT
was not declared in this scope.
What could be the problem?
Hi, you must find and import the dht.h library correctly, it appears to be be slightly difficult since most files do not seem to work, but you have to do it, you can refer to the following link for some info:
https://community.blynk.cc/t/correct-dht-library/30774/5
Hello sir !
I use correct library for dht as
Above mention link.but I face error in compilation.
Void loop:
error : DHTLIB_ERROR_CONNECT
was not declared in this scope.
but i delete this line from code
(case DHTLIB_ERROR_CONNECT:)
Compilation successful.
If can we control temperature and humidity, how
Hi Nitin,
To control temperature and humidity you need a cooling or heating device or both. To control humidity you need water vaporizer (humidifier) or dehumidifier or both. The sensor and Arduino must be programmed in a way that it triggers the mentioned climate control devices on/off to meet your set temp & humidity.
The above concept works optimally in a closed enclosure.
One example of this is a incubator: https://www.homemade-circuits.com/incubator-using-arduino-with-automatic-temperature-and-humidity-control/
Regards
Mr.GR will reply you soon…
Sir can we use LM35 or thermistor sensors instead of DHTxx?
Hi,ananth
you can't use LM35 in the place of DHT sensor, they both work in very different way.
Ananth, it will depend on the specifications of the two sensors, if they match reasonably well then perhaps it could work with the proposed Arduino design.