Here I have explained the bare minimum code for compiling an Arduino and also the method of blinking an LED using an Arduino board.
Learning the Bare Basics
Here we discus and try to understand the fundamental minimum code that one would need to compile an “Arduino Sketch” which consists the setup()method and the loop()method.
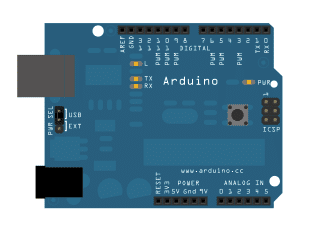
The only required Hardware for this is an Arduino Board, no additional circuit board is required.
The setup() function is rendered as soon as a “sketch” is initiated. We enforce it in order to set forth the variables, pin modes, begin involving libraries, etc.
The setup operation is assigned for executing just once, every time the Arduino board is switched ON or is reset.
Once you develop a setup() functionality, the loop()function executes exactly what its named after, that is it begins looping successively, providing a chance to your program to alter and respond as it runs and moves ahead.
Code which comes under the loop() section of your “sketch” is enforced to vibrantly take control of the Arduino board.
The compiler will not read all those lines which might begin with a couple of slashes (//), which indicates that you are supposed to write your code only after this.
Expressing your code in this form ensures ease of explaining the folks who may be reading it, as well to yourself regarding how the program could be proceeding in a step by step manner.
void setup() {
  // put your setup code here, to run once:

}

void loop() {
  // put your main code here, to run repeatedly:

}
Blinking an LED with Arduino
Here I have explained regarding the most basic electronic circuit operation that one can execute using an Arduino board, yes it’s about blinking an LED through a code.
The only additional device other than an Arduino board that you would require is an - LED.
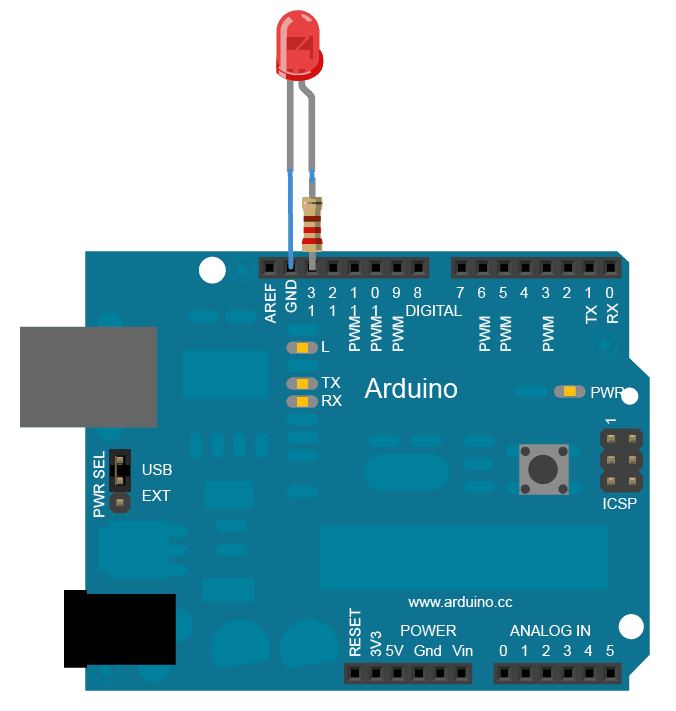
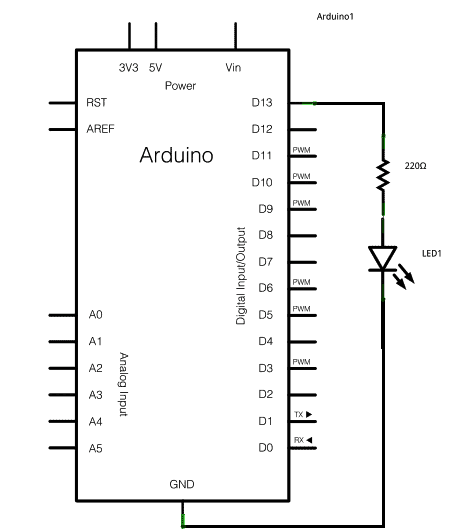
To begin with the procedure, you need to connect a 330 ohm ¼ watt resistor to pin#13 of the board.
Next, connect the LED with this 330 ohms resistor and ground (long lead goes to 330 ohm while the shorter lead to ground).Now hook up the Arduino board with your computer, initialize the program and feed the code tha’s presented later on this page.
Traditionally Arduinos would have an LED connected across its pin#13, which starts blinking when powered without any hardware involved.
Implementing the Code
In order to implement the code, the first execution would be to toggle pin#13 to form an output pinout with the line:
pinMode(13, OUTPUT);
Across the main loop, we switch ON the LED through the line:
digitalWrite(13, HIGH);
The above enables a 5V supply to pin#13 so that I generates the required potential across the LED, illuminating it.
Now we switch it OFF using the following line:
digitalWrite(13, LOW);
Yeah, logically this reverts pin#13 to zero, switching OFF the LED.
Now in between the above ON and OFF of the LEDs we would require a certain time delay gap, so that the blinking makes sense and becomes recognizable.
The code delay() commands Arduino to remain stationery until a second, in other words this command mutes
the operations for a second.
The Code:
/*
  Blink
  Turns on an LED on for one second, then off for one second, repeatedly.

  This example code is in the public domain.
 */

// Pin 13 has an LED connected on most Arduino boards.
// give it a name:
int led = 13;

// the setup routine runs once when you press reset:
void setup() {
  // initialize the digital pin as an output.
  pinMode(led, OUTPUT);
}

// the loop routine runs over and over again forever:
void loop() {
  digitalWrite(led, HIGH);   // turn the LED on (HIGH is the voltage level)
  delay(1000);               // wait for a second
  digitalWrite(led, LOW);    // turn the LED off by making the voltage LOW
  delay(1000);               // wait for a second
}


Questions & Answers
Hi SWA. I'm considering buying an arduino. It a Mega 2560 r3 with a starter kit. could you advise if its a reasonable choice to begin with. also can u use multiple inputs to activate their own sub-procedures at the same time Or assign varying interrupt level for certain inputs. Thank U.
Hi perumal, I suggest arduino uno is the best and cheapest one when you are at starting stage. First of all you try with arduino uno when you studied all the process such as spi,i2c,LCD,xbee e.t.c interfacing using arduino uno then you move for arduino mega….I got a clone version of arduino uno from Amazon at 450rs….it works well
Hi Mitchell, I am not so well versed with Arduinos, so won't be able to suggest correctly.
I have atmega32,
can we control 4 motors using atmega 32?