In this post I will explain how to make one full adjustable lighting sequence generator which can control and illuminate many external bulbs through triacs in many different running patterns. We can make it so that user can change and select any sequence pattern easily. We will use Arduino for the full control part. Let us go step by step so that we can understand it easily.
Basic Idea And Working
So this circuit will use Arduino to create different lighting sequences. We can have 8 channels or even more channels and each channel will operate one external AC lamp or bulb through its own triac. So Arduino will decide which bulb will light, how bright it will glow and in which order the bulbs will chase or fade.
Each bulb is connected through a MOC3063 type optocoupler and one main triac such as BTA16.
First we will discuss the basic manual version of the 8 channel lighting sequence generator.
Parts And Materials
Now we can list all important parts. We will need one Arduino Uno or Nano board.
Then we need 8 pieces of MOC3063 optocouplers which are zero-cross type, and 8 triacs such as BTA16 or BT136 according to our load current.
We must also add one fuse, one main switch, some screw terminals, and one properly insulated box. We will also use one rotary encoder and one push button. We can connect one 10k potentiometer for speed control. One 16x2 LCD or OLED display is optional.
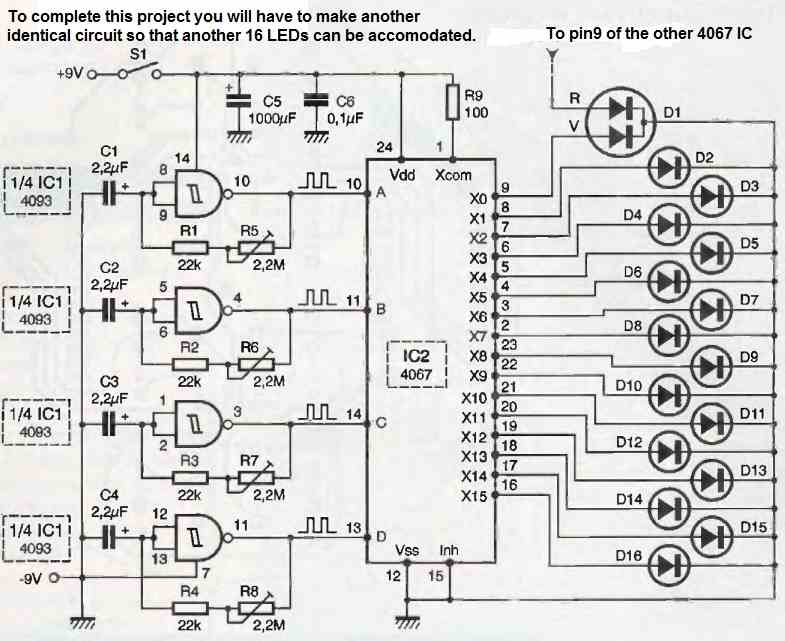
Circuit Diagram (Manual Selection Mode)

Output Lamp Sequencing Pattern
This can be very important to visualize how the whole light show will actually look when you connect all 8 LED bulbs to the SSRs on D2 to D9.
Let us now go step by step through each pattern in the code and explain exactly what happens to each LED bulb in that pattern, so you can imagine the full visual effect clearly.
Pattern 0 – Simple Chase
In this mode, the light runs forward one by one in a chasing style.
So what happens is like this, bro:
The Arduino turns ON the first LED bulb (connected to D2) then it stays ON for a short delay of about 150 milliseconds, then it turns OFF. Immediately after that, the next bulb (D3) turns ON and then turns OFF.
This goes on step by step until the last bulb (D9) glows and turns OFF.
So you see the lights appear to move in one direction like a running light line. It looks like the bulbs are chasing each other from left to right (or whichever side you wire them).
After reaching the last bulb, then it repeats again from the first bulb continuously.
So this looks like a smooth forward-running chase effect.
Pattern 1 – Backward Chase
Now this is just the opposite of the first one.
Here the Arduino starts from the last bulb (D9) and moves backward one by one until the first bulb (D2).
So you will see the light running back from the last bulb to the first bulb.
It again repeats continuously, giving a beautiful reverse chasing appearance.
If you keep switching between Pattern 0 and Pattern 1, it will look like the light is running forward and backward alternately.
Pattern 2 – Two Bulbs Moving Together
Now this is where two bulbs glow at a time, moving together like a double-light snake.
So first Arduino turns ON D2 and D3 together for a short time then turns both OFF.
Next it turns ON D3 and D4 together, then OFF, and so on.
So you will see two lights always ON together and moving forward step by step.
This looks like two headlights moving along the light strip at the same time.
When it reaches the end (D8 and D9 ON together), then it again loops back to the start.
Pattern 3 – All Blink Together
This one is very simple but very effective visually.
Here the Arduino switches all D2 to D9 ON at the same time, then keeps them ON for 300 milliseconds, then turns all OFF for another 300 milliseconds.
So all 8 LED bulbs blink together ON and OFF rhythmically like a synchronized strobe flash.
It gives a bright pulsing flash effect and is useful for attention-grabbing displays or festival lighting.
Pattern 4 – Ping-Pong Effect
This is the most interesting one, bro.
Here the light goes forward from D2 to D9 one by one, and then immediately runs back from D8 to D3 one by one.
So it keeps bouncing back and forth continuously, just like a ping-pong ball hitting both sides.
It creates a very dynamic effect that looks like the light beam is moving from one end to the other and then bouncing back again endlessly.
This is often used in decorative running lights or stage displays.
Now How It Will Change Between These Patterns
So when your SPST switch is in OFF position (manual mode) then you can press the push button and each press will jump to the next pattern. After Pattern 4 it again comes back to Pattern 0.
But when you turn ON the SPST switch (auto mode) then Arduino itself keeps changing patterns automatically every few seconds (you can adjust this delay in code by changing changeInterval = 4000;).
So the full lighting setup keeps running through all patterns — first forward chase, then backward, then double-light chase, then full blink, then ping-pong — and again repeats.
Triac Driver Section
Now we will see how each channel can be wired. We can take one MOC3063 for each channel. Its LED side will be driven from Arduino. But since Arduino cannot supply large current for all opto LEDs directly, we can use one small NPN transistor for each channel.
So Arduino output pin goes to base of 2N2222 transistor through one 1k resistor. The emitter of that transistor goes to Arduino GND. The collector of that transistor goes to MOC3063 LED cathode. The LED anode of MOC3063 goes to +5V through 330Ω resistor, so when Arduino output becomes HIGH then transistor conducts and LED of MOC3063 lights, which in turn will trigger the main triac through MOC output terminals.
The MOC output terminal connects to the gate and MT1 of triac through one gate resistor around 180Ω to 360Ω. The triac itself connects in series with the AC line and bulb. We can also add one snubber network of 100Ω + 100nF/275VAC across MT1 and MT2. That will protect from false triggering.
Control And User Interface
We can use 3 buttons for example one button for NEXT, one for PREV, and one for START or STOP.
Step By Step Connection Explanation
Now we will go step by step for all the pins and connections.
Arduino Power Section
We give 5V regulated DC to the Arduino board. You can power it through the 5V pin or through the USB port if you want, but if you are using external 12V DC power then you can connect that to the VIN pin of Arduino and GND.
We must make sure that the Arduino ground and the logic ground of all optocouplers are common, but the AC section should be fully isolated through the opto drivers.
Output Pins To Triac Drivers
Now we come to the main output pins. Let us assume we are controlling 8 bulbs, so we will use 8 Arduino digital output pins. For example, we can take D2 to D9 as our output pins.
Each output pin will connect to one current-limiting resistor (around 220 ohm or 330 ohm) and then go to the input LED pin of one MOC3063 optocoupler. The other side of the optocoupler LED goes to Arduino ground.
Inside the MOC3063, when the LED turns ON, then it triggers the internal triac driver transistor which in turn triggers the external triac gate.
Triac Power Section
Now we connect the AC power part. The external load bulbs will be powered through the main AC line. Each bulb will have one Triac in series, so the MT2 terminal of the Triac will go to the AC Live line, the MT1 will go to one end of the bulb, and the other end of the bulb will go to Neutral.
The gate pin of the Triac will connect to the output pin of the MOC3063 (pin 6) through a small resistor, around 180 ohm. The MOC3063 pin 4 will go to the MT2 line.
We can also add an RC snubber network across each Triac (100 ohm + 0.1µF/400V) for protection and to prevent false triggering.
Push Buttons For Sequence Selection
Now for selecting different running light patterns, we can connect push buttons. Let us say we use three push buttons, one for NEXT, one for PREVIOUS, and one for START/STOP.
We can connect them to D10, D11, and D12 pins of Arduino. Each button will have one side connected to GND and the other side connected to the respective Arduino pin. We enable the internal pull-up resistors in the code using pinMode(pin, INPUT_PULLUP).
So that when you press the button, then input becomes LOW and when you release it, then it stays HIGH.
LCD Display (Optional)
If we want to show the sequence number or status, then we can connect a 16x2 LCD in 4-bit mode. The connections can be like this:
RS → D13
E → A0
D4 → A1
D5 → A2
D6 → A3
D7 → A4
And the LCD VCC goes to +5V and GND to GND. The contrast pin (V0) can go through a 10K potentiometer between +5V and GND for brightness adjustment.
Power Supply for the Circuit
Now we come to the power supply. We can use one small 12V DC adapter or SMPS which can go to Arduino VIN and the Arduino onboard regulator will generate 5V for logic. We can also tap 5V directly for the optocoupler LEDs and buttons.
How The Whole System Works
When we power the system, the Arduino starts and initializes all pins. The default lighting pattern can be sequence number 1. The Arduino code will control which output pin goes HIGH at which time, to create different running patterns for the bulbs.
Each HIGH output makes the corresponding optocoupler LED turn ON which fires the external Triac and turns ON that bulb. By switching these outputs in different time sequences, we can create chasing, running, blinking, alternate, wave and custom patterns.
By pressing the NEXT or PREVIOUS button, we can scroll through the saved lighting sequences in the Arduino memory. The LCD (if used) will show which sequence number is active. The START button can begin or pause the light sequence.
Safety Note
We must remember that Triacs are directly connected to AC mains, so we must handle the wiring carefully and keep all AC parts isolated from the Arduino section. The MOC3063 gives isolation but we must also make sure the AC wiring is done with proper insulation.
Understanding The Push Buttons
Now we talk about the push buttons. These push buttons should be momentary type, which means that they are the type that make contact only when you press and release back immediately when you remove your finger.
They should not be latching or permanent ON type switches, because we are only using them to send short signals to Arduino, not to hold a fixed ON or OFF condition.
Why We Use Momentary Type Buttons
We use momentary buttons because in this design, the Arduino reads the button state quickly many times per second. It checks whether any button was pressed.
So, if you use a permanent type switch then it will stay in that position, and the Arduino will think you are continuously pressing that button. That will cause the pattern to keep changing repeatedly without stopping.
With momentary type buttons, the Arduino detects only one short LOW pulse each time you press, so it can increase or decrease the sequence number by one step or start or stop the running lights one time per press.
How Each Button Affects The Output Pattern
Now let us explain what each button does in the lighting sequence system.
- NEXT Button (connected to D10)
When you press this button, then Arduino will read a LOW signal on D10, then it will increase the pattern number by one, so for example, if you are in pattern number 1, it will go to pattern number 2. If you keep pressing it again and again then it will go to 3, 4, 5, and so on, until it reaches the last pattern, after which it can go back to pattern number 1 automatically. - PREVIOUS Button (connected to D11)
When you press this button, then Arduino will read a LOW signal on D11, then it will decrease the pattern number by one, so if you were on pattern number 4, then it will go back to 3. If you keep pressing more, then it will go down till pattern 1 and after that it can jump back to the last pattern if you want circular mode. - START/STOP Button (connected to D12)
When you press this button then Arduino will toggle between ON and PAUSE mode, meaning if the lights are running in some sequence, then pressing this will freeze the sequence at the current stage. Pressing it again will restart the running sequence from that same point or from the beginning, which will depend on how we write the code.
What Happens Inside Arduino When Button Is Pressed
Now we explain what happens inside. When you press any button, then Arduino senses that change in voltage on its pin, then it runs a small code block which modifies the value of a variable called “patternNumber” or “modeNumber”.
Then according to this patternNumber, the Arduino changes which output pins will turn HIGH and LOW and at what timing. That is what gives the visible lighting effect.
So pressing buttons does not directly affect the bulbs or Triacs, rather only tells Arduino to switch to another logic pattern. Arduino then updates the outputs accordingly.
What Happens If Push Buttons Are Not Present
Now suppose you do not connect any push buttons at all, then als the circuit will still work fine but it will always stay in the default lighting pattern which we define in the code, normally pattern number 1.
In this case, the Arduino will keep running the same lighting effect continuously from the time you power it ON. You cannot change or stop the pattern since there will be no manual input from you.
If you want, you can modify the code so that after every few seconds, Arduino automatically shifts to the next pattern on its own, even without push buttons. That will create an auto-demo mode, we will discuss this code also in the later part below....
What If You Use Permanent Switches Instead
If you mistakenly use permanent ON-OFF toggle switches instead of momentary push buttons, then what will happen is the Arduino will keep reading the pressed state continuously as long as the switch stays ON which will make it keep jumping patterns repeatedly without waiting, or it might even hang due to too many changes.
That is why we always prefer momentary type tactile push buttons for this kind of interface as they are small, quick, and reliable.
Summary
So to summarize clearly:
- Use momentary push buttons (tactile type).
- Each press gives one quick command to Arduino.
- “NEXT” → Goes to next lighting sequence.
- “PREVIOUS” → Goes to previous sequence.
- “START/STOP” → Pauses or resumes the current sequence.
- If buttons are absent → Only default pattern runs forever.
- If toggle switches are used → The Arduino may behave unpredictably or cycle patterns too fast.
Adding an Automatic Pattern Shifting
Now we want to make our light controller little smarter and want that it can automatically change from one lighting pattern to another without pressing any button. But we also do not want this to happen always so we are going to use one SPST switch that will decide whether this automatic shifting is allowed or not.
When this SPST switch is ON, then the Arduino will after every few seconds change to the next pattern by itself. When this switch is OFF, then the Arduino will not do that and the pattern will remain fixed unless you press the NEXT or PREVIOUS button manually.
Circuit Diagram (Automatic + Manual Mode Selection)

How To Connect The SPST Switch
Now we explain the wiring for that. We will use one normal small SPST switch, the type that has two terminals only.
- One terminal of this switch will go to GND of Arduino.
- The other terminal will go to any free digital pin of Arduino.
Let us say we use D13 for this function.
We will set that pin D13 as an INPUT_PULLUP in the code which means when the switch is OPEN, then Arduino will read it as HIGH. When you close the switch, then it connects to GND and Arduino will read it as LOW.
How It Will Work In Code
So in the program we will keep checking that D13 pin again and again.
- If D13 reads LOW, that means the switch is turned ON, so auto mode is activated.
- If D13 reads HIGH, that means the switch is turned OFF, so auto mode is deactivated.
Then, when the auto mode is active, the Arduino will start counting time internally. We can use one variable like “autoTimer” or “millis()” function to measure the time passed. When the set time (say 5 seconds) is reached, then Arduino will automatically shift to the next pattern exactly the same way as if you had pressed the NEXT button once.
After that, it will reset the timer and wait again for next 5 seconds and continue to do this in a loop as long as the switch stays ON.
What Happens When Switch Is Turned OFF
Now suppose the SPST switch is turned OFF in the middle of operation, then the Arduino immediately sees D13 as HIGH and stops changing patterns automatically. It will keep showing the current pattern forever until you manually press NEXT or PREVIOUS button.
That means the auto mode can be turned ON or OFF anytime, even during running sequence, without restarting the Arduino which makes it very flexible.
Step By Step Connection Summary
Here is how the final connection will look like now:
| Function | Arduino Pin | Type | Notes |
|---|---|---|---|
| Output 1–8 | D2–D9 | Output | To MOC3063 drivers |
| NEXT Button | D10 | Input (PULLUP) | Momentary |
| PREVIOUS Button | D11 | Input (PULLUP) | Momentary |
| START/STOP Button | D12 | Input (PULLUP) | Momentary |
| AUTO Mode Switch | D13 | Input (PULLUP) | SPST ON/OFF |
| LCD RS | A0 | Output | Optional |
| LCD E | A1 | Output | Optional |
| LCD D4–D7 | A2–A5 | Output | Optional |
Internal Working Example
Let us take a small example for understanding.
- You turn ON the power.
- The auto switch is in OFF position.
- The system starts and runs pattern number 1 continuously.
- You press NEXT → it goes to pattern 2.
- You press START/STOP → it pauses or resumes.
- Now you flip the AUTO switch to ON position.
As soon as you do that, then Arduino begins its timer. After 5 seconds it automatically changes to pattern 3, after another 5 seconds, it goes to pattern 4 and so on. When it reaches the last pattern, it goes back to pattern 1 and repeats forever.
If at any time you turn the AUTO switch OFF again, then automatic change stops immediately and the light remains fixed on whichever pattern was active at that time.
Why This SPST Switch Is Better Than Button
The main advantage of this SPST switch is that you do not need to hold it or press repeatedly, you just turn it ON once and the Arduino knows it must keep changing the pattern by itself. When you want to go back to manual control, then you just turn it OFF again.
This avoids continuous button pressing and, gives smooth automatic demonstration.
Arduino Code with Automatic Sequencing Pattern Generation
Here is the final full Arduino code for our adjustable lighting sequence generator that controls triacs for multiple bulbs. This version includes the SPST switch feature, so that when the SPST switch is turned ON, then Arduino will automatically keep changing to the next lighting pattern after every few seconds, but when the SPST switch is turned OFF, then pattern will stay fixed until you manually change it using the push buttons (if connected).
// Arduino LED Bulb Running Sequence Generator (Zero-Cross SSR Version)
// Supports Auto Mode (SPST Switch) and Manual Mode (Push Button)
// D2–D9 control 8 SSR channels connected to LED bulbs

const int channelPins[] = {2, 3, 4, 5, 6, 7, 8, 9};  // Output pins to SSRs
const int numChannels = 8;

const int buttonPin = 10;     // Manual mode push button
const int autoSwitch = 11;    // SPST auto-mode switch

int patternNumber = 0;
unsigned long lastChange = 0;
unsigned long changeInterval = 4000;  // 4 seconds before switching to next pattern automatically

void setup() {
  for (int i = 0; i < numChannels; i++) {
    pinMode(channelPins[i], OUTPUT);
    digitalWrite(channelPins[i], LOW);
  }

  pinMode(buttonPin, INPUT_PULLUP);
  pinMode(autoSwitch, INPUT_PULLUP);
}

void loop() {
  bool autoMode = digitalRead(autoSwitch) == LOW;  // Auto mode ON when switch is grounded
  bool buttonPressed = digitalRead(buttonPin) == LOW;

  // Manual pattern change
  if (!autoMode && buttonPressed) {
    delay(200);
    patternNumber++;
    if (patternNumber > 4) patternNumber = 0;
  }

  // Automatic pattern change after few seconds
  if (autoMode && millis() - lastChange > changeInterval) {
    patternNumber++;
    if (patternNumber > 4) patternNumber = 0;
    lastChange = millis();
  }

  runPattern(patternNumber);
}

// ===== PATTERNS =====
void runPattern(int p) {
  switch (p) {

    case 0:  // Simple chase
      for (int i = 0; i < numChannels; i++) {
        turnOnOne(i);
      }
      break;

    case 1:  // Backward chase
      for (int i = numChannels - 1; i >= 0; i--) {
        turnOnOne(i);
      }
      break;

    case 2:  // Two bulbs ON moving
      for (int i = 0; i < numChannels - 1; i++) {
        digitalWrite(channelPins[i], HIGH);
        digitalWrite(channelPins[i + 1], HIGH);
        delay(150);
        digitalWrite(channelPins[i], LOW);
        digitalWrite(channelPins[i + 1], LOW);
      }
      break;

    case 3:  // All blink together
      digitalWriteAll(HIGH);
      delay(300);
      digitalWriteAll(LOW);
      delay(300);
      break;

    case 4:  // Ping-pong effect
      for (int i = 0; i < numChannels; i++) {
        turnOnOne(i);
      }
      for (int i = numChannels - 2; i > 0; i--) {
        turnOnOne(i);
      }
      break;
  }
}

// ===== Helper Functions =====
void turnOnOne(int index) {
  digitalWrite(channelPins[index], HIGH);
  delay(150);
  digitalWrite(channelPins[index], LOW);
}

void digitalWriteAll(int state) {
  for (int i = 0; i < numChannels; i++) {
    digitalWrite(channelPins[i], state);
  }
}
Final Connection Details for the above Modified Code
1) Power And Ground
We power Arduino by USB or 12V adapter then Arduino gives 5V to logic, make sure Arduino GND is common with the low-voltage side of all optocouplers (the LED side), so connect Arduino GND to the cathode side of each MOC LED (or to the emitter of the NPN driver if you use transistor drivers). But do NOT connect Arduino GND to mains Neutral or Live. Keep mains side isolated from Arduino logic by the MOC output. Always remember this rule.
2) Driving The MOC LED From Arduino (per channel)
For each channel 1..8 do this now:
- Take the Arduino output pin (for channel 1 use D2, channel 2 use D3, ... channel 8 use D9).
- Put one series resistor 220Ω between Arduino pin and the MOC LED anode (this limits LED current). For example:
D2 → 220Ω → MOC LED Anode. - Connect the MOC LED Cathode to Arduino GND, so the LED path becomes: Arduino D2 → 220Ω → MOC LED Anode → MOC LED Cathode → Arduino GND.
- When Arduino writes HIGH on that pin then MOC LED will light and MOC output will be ready to trigger the main triac.
- If you prefer transistor drivers then use NPN transistor low-side switch:
Arduino pin → 1k base resistor → NPN base, NPN emitter → Arduino GND, NPN collector → MOC LED cathode and MOC LED anode → +5V with 220Ω. This is optional and only for extra drive reliability.
Note: Many people prefer transistor drivers for stable current if many optos are driven at same time, but simple direct drive (Arduino pin → 220Ω → MOC LED → GND) works for single pulses as in our code.
3) MOC Output Side To Main Triac (per channel)
Now wiring on the mains side (this part touches AC mains and is dangerous, do not touch live while powered):
- The MOC has two output pins (triac driver side). Connect one MOC output pin to the triac gate through a gate resistor 180Ω (some use 180Ω–360Ω). So:
MOC Output → 180Ω → Triac Gate. - Connect the other MOC output pin to the triac MT1 (or to the triac MT2 depending on datasheet wiring that avoids false triggering); typical simple wiring:
MOC Output other terminal → Triac MT1. Follow the MOC and triac datasheet recommended wiring. The MOC output and triac gate form the gate trigger path. - The triac MT2 goes to AC Live (through fuse/switch). The triac MT1 connects to one side of the bulb. The other side of the bulb goes to AC Neutral. So final:
AC Live → fuse → Triac MT2,Triac MT1 → Bulb → AC Neutral. - Place a small resistor 33k from triac gate to MT1 (gate bleed resistor) to prevent false triggers if you want. This is optional but recommended for stability.
Important: the MOC output is isolated from Arduino logic and acts like safe bridge between low-voltage and mains, but still handle mains wiring with caution.
4) Snubber And Safety Components (per channel)
- Put RC snubber across triac MT1–MT2 if your load is inductive or you see false triggering:
R = 100Ω (0.5W) in series with C = 100nF/275VACacross MT1–MT2. - Use a proper fuse in series with AC Live before Triac MT2 to protect wiring and lamps. Choose fuse rating suitable for lamp current.
- Consider using an MOV across Live and Neutral for surge protection (optional).
- Heatsink the triac if current is high.
5) Push Buttons Wiring (Momentary)
We use three momentary push buttons: NEXT (D10), PREVIOUS (D11), START/STOP (D12). Each is wired the same way:
- One terminal of each push button goes to Arduino GND.
- Other terminal goes to the corresponding Arduino pin (D10, D11, D12).
- In code we enable
INPUT_PULLUPfor these pins which means: when button is NOT pressed then pin reads HIGH, When you press the button then pin is pulled to GND and reads LOW, so each press gives a short LOW pulse that Arduino reads as a command.
Remember: Momentary tactile push buttons are correct type. Do NOT use latching toggle switches here.
6) SPST Switch For Auto Mode (D12 in earlier code used for START/STOP; in final code autoSwitch = 12 — confirm your wiring with code; here follow the final code: autoSwitch = 12)
Important: Your final code uses autoSwitch = 12. So we wire SPST to Arduino pin 12.
- One terminal of the SPST switch goes to Arduino GND.
- Other terminal goes to Arduino D12 (autoSwitch pin).
- In code we set
pinMode(autoSwitch, INPUT_PULLUP);so that when the switch is OPEN then D12 reads HIGH and when switch is CLOSED (ON) then D12 reads LOW because it is grounded. - When the switch is ON (closed to GND), then Arduino will see autoMode active then it will change patterns every
autoIntervalmilliseconds. When switch is OFF (open) then Arduino will not auto-shift patterns.
Note: Do not confuse the START/STOP push button and SPST auto switch pin. In the code we used nextButton=10, prevButton=11, autoSwitch=12, So START/STOP was omitted in that final code example — if you earlier had a START/STOP, then move pins accordingly. Check code pin assignments before wiring.
7) Example Single-Channel Full Wiring Summary (do this per each of 8 channels)
- Arduino D2 → 220Ω → MOC LED Anode.
- MOC LED Cathode → Arduino GND.
- MOC Output Pin (triac side) → 180Ω → Triac Gate.
- MOC Other Output Pin → Triac MT1.
- Triac MT2 → AC Live (via fuse).
- Bulb → Triac MT1 → Bulb other end → AC Neutral.
- RC Snubber (100Ω + 100nF/275VAC) across Triac MT1–MT2 (optional).
- Gate to MT1 bleeder resistor 33k optional.
Compact Table — Arduino Pin To Component Connections
| Arduino Pin | Connected To (component) | Exact Wiring / Notes |
|---|---|---|
| D2 | MOC LED (channel 1) | D2 → 220Ω → MOC LED Anode ; MOC LED Cathode → Arduino GND |
| D3 | MOC LED (channel 2) | D3 → 220Ω → MOC LED Anode ; MOC LED Cathode → Arduino GND |
| D4 | MOC LED (channel 3) | D4 → 220Ω → MOC LED Anode ; MOC LED Cathode → Arduino GND |
| D5 | MOC LED (channel 4) | D5 → 220Ω → MOC LED Anode ; MOC LED Cathode → Arduino GND |
| D6 | MOC LED (channel 5) | D6 → 220Ω → MOC LED Anode ; MOC LED Cathode → Arduino GND |
| D7 | MOC LED (channel 6) | D7 → 220Ω → MOC LED Anode ; MOC LED Cathode → Arduino GND |
| D8 | MOC LED (channel 7) | D8 → 220Ω → MOC LED Anode ; MOC LED Cathode → Arduino GND |
| D9 | MOC LED (channel 8) | D9 → 220Ω → MOC LED Anode ; MOC LED Cathode → Arduino GND |
| MOC Output (per channel) | Triac Gate | MOC Output → 180Ω gate resistor → Triac Gate (per channel) |
| MOC Other Output (per channel) | Triac MT1 | MOC other pin → Triac MT1 (follow datasheet wiring) |
| Triac MT2 (per channel) | AC Live via fuse | AC Live → fuse → Triac MT2 |
| Triac MT1 (per channel) | Bulb → AC Neutral | Triac MT1 → Bulb → AC Neutral |
| Any Triac MT1–MT2 | RC Snubber | 100Ω (0.5W) in series with 100nF/275VAC across MT1–MT2 (optional) |
| D10 | NEXT Button | D10 ← push button ← GND ; use INPUT_PULLUP. Press → LOW → Next pattern |
| D11 | PREV Button | D11 ← push button ← GND ; use INPUT_PULLUP. Press → LOW → Prev pattern |
| D12 | SPST Auto Switch | D12 ← SPST ← GND ; use INPUT_PULLUP. Closed (ON) → LOW → Auto mode active |
| 5V | MOC LED Anode (if using transistor drivers) | Optional driver wiring: +5V → 220Ω → MOC LED Anode, MOC LED Cathode → NPN collector, NPN emitter → GND, Arduino pin → 1k → NPN base |
| GND (Arduino) | All MOC LED Cathodes and Button GNDs | Common logic ground for low-voltage side only |
Final Summary
So this is one full adjustable lighting sequence generator project using Arduino and triacs. We can connect many AC lamps and we can control them in various chasing, forward/reverse, ping-pong, double snake or strobe patterns. We can also create our own custom patterns and store them in memory.
This project can be used for festivals like Christmas, Diwali, parties, stage decoration, light shows, or even home lighting effects. But since it deals with AC mains, we must always handle it carefully.
Now we can start building and testing step by step and enjoy seeing all lamps running in beautiful programmed sequences.


Comments
Another very interesting design – How about one using esp32 driving a homemade rope of coloured LED’s with the esp32 having Bluetooth or wifi control ??
Just bought 600 Red, Yellow, Blue individual LEDs and was now thinking about the control and, probably more importantly, the physical installation to make waterproof.
Come to the conclusion 24v DC is a must to drive 200 red 200 blue and 200 yellow leds.
Any chances of a design??
Very interesting ideas you are sharing with us, I must say.
I will try to design this circuit and post it as a new article soon…
12V DC can be also adjusted to drive the 200 nos of LEDs simply by configuring them in series and parallel setups…
I have not sat down and worked out currents yet, very dependant on the layout using 6 different colours ORGBYW.
I have space for 25m of rope (clear tubing). So I need to split each colour into lengths/spacing.
25m / 6 = 4.1metres per colour total.
Then splitting that down into each colour having pitches of say 0.5m each having 5 LED’s.
Total number of LED’s = (25m/0.5m)*5leds = 250 total LED’s.
I have 600, so plenty of spares. Or maybe add them closer.
So what distance would be best to achieve a flowing rainbow effect colour, making 0.5m pitches shorter and increasing the number of LED’s ?
Control of LED’s would probably be by directly connecting esp32 to MOSFET VNQ5E160K which can be controlled directly from esp32 with 3.3v gate logic, and 12v Vcc or maybe 24v dependant on leds.
Your idea sounds great, let me figure it out, I will come back to you soon…
Sir, Best best and Best experiment. I am surprised how much time you have spend on this description.
Sir great ❤️
Thank you Arif, glad you liked the article, please let me know if you face any problems with the circuit, I will try my best to solve it for you…