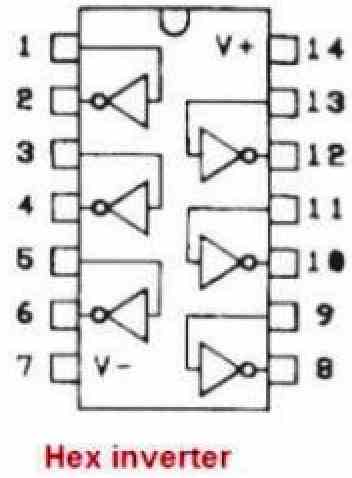
In this article I will be talking about this device that we call HCPL3120 or also J312, and we see that it is an isolated gate drive opto coupler which we can use for driving H-bridge MOSFET and IGBT gates safely from the low voltage logic side to the high voltage power side.
It has an input LED and it throws the light through the isolation gap, and that light is received by an internal detector IC which drives a totem pole output.
We also see that this device gives around 2 ampere peak source and sink current to the gate, and that output side works from 15 volt to 30 volt supply. It also has the under voltage lockout feature so that when the supply drops then it will not allow partial gate drive and it keeps the MOSFET or IGBT off.
We also find that the VOL is very low so we do not require negative gate voltage for turn off.
Main Technical Parameters
You can see that the output peak current is around 2.0 ampere minimum and 2.5 ampere typical. The low output voltage VOL is less than 0.5 volt so the gate is strongly pulled down. The output side supply can be from 15 volt to 30 volt. The normal supply current is around 5 milliampere.
The common mode transient immunity is around 15 kilovolt per microsecond minimum and some versions can go 25 kilovolt per microsecond.
The propagation delay from input to output is around 135 nanosecond and sometimes can reach 500 nanosecond in worst case. The isolation voltage is 3750 Vrms for 1 minute for the normal package.
We also see that the input LED needs around 10 milliampere to 16 milliampere to turn it on reliably. Rise and fall time is roughly 100 nanosecond.
Features Table
| Feature | Value |
|---|---|
| Peak output current max | 2.5 A |
| Peak output current min | 2.0 A |
| Low level output voltage VOL | 0.5 V max |
| Supply current ICC | 5 mA max |
| Common mode transient immunity | 15 kV/µs min (25 kV/µs on some versions) |
| Under voltage lockout | Yes with hysteresis |
| Output supply voltage range | 15 V to 30 V |
| Max switching speed | 500 ns |
| Operating temperature | –40°C to 100°C |
| Isolation voltage | 3750 Vrms 1 min |
Here we see that this device can push up to two point five ampere to the gate, low VOL means no negative gate needed, ICC low, dv/dt tolerance high, UVLO present, and isolation safe up to 3750 Vrms.
Selection Guide Table
| Part Number | Peak Current | VIORM (Working Isolation Voltage) |
|---|---|---|
| HCPL-3120 | 2.5 A | 630 V peak |
| HCPL-J312 | 2.5 A | 891 V peak |
| HCNW3120 | 2.5 A | 1414 V peak |
Now see that base 3120 has 630 V peak isolation, J312 has 891 V peak and HCNW3120 is for high isolation 1414 V peak, all current same.
Recommended Operating Conditions Table
| Parameter | Symbol | Min | Max | Units |
|---|---|---|---|---|
| Output supply voltage | VCC–VEE | 15 | 30 | V |
| Input LED current ON | IF | 7 | 16 | mA |
| Operating temperature | TA | –40 | 100 | °C |
So, we give output side fifteen to thirty volt, LED drive around seven to sixteen milliampere and the device works from minus forty to plus hundred degree.
Truth Table
| LED | Output Supply | Output VO |
|---|---|---|
| OFF | Any 0-30 V | LOW |
| ON and VCC < 11 V | 0-11 V | LOW |
| ON and VCC ~11-13.5 V | 11-13.5 V | Transition |
| ON and VCC > 13.5 V | 13.5-30 V | HIGH |
When LED is off output stays low. When LED is on but supply is below UVLO threshold it still stays low. In between it transitions. When supply is high then output goes high.
Electrical Characteristics Table
| Symbol | Parameter | Min | Typ | Max | Units |
|---|---|---|---|---|---|
| IO | Peak output current | 2.0 | 2.5 | 2.5 | A |
| VOL | Output low voltage | — | — | 0.5 | V |
| ICC | Supply current | — | — | 5 | mA |
| CMR | Common mode transient immunity | 15 | 25 | — | kV/µs |
| tPLH / tPHL | Propagation delay turn on/off | — | 135 | 500 | ns |
| PDD | Propagation delay difference | — | — | 350 | ns |
Peak current is two to two point five ampere, VOL max half volt, ICC five milliampere, dv/dt fifteen to twenty five kilovolt per microsecond, propagation delay 135 ns typical and 500 ns worst and difference up to 350 ns.

Internal Working
Now let's explain in simple way that first the input LED will take current from the logic side. When we give this current then the LED emits light. That light is passing across the isolation barrier and it hits the internal photo detector and logic circuit.
That internal circuit checks the supply VCC and if that VCC is above the under voltage lockout level then it drives the output stage.
The output stage is a totem pole driver which can both source and sink current to the gate. We also see that there is an internal low resistance for pull down around 1 ohm. The optical isolation barrier makes the input side and output side completely galvanically isolated.
Input Design
We then calculate the resistor for LED input side. We do like this formula
Rin = (Vdrive - VfLED) / IFHere VfLED is around 1.2 to 1.8 volt and IF we can choose 16 milliampere. So if we have 5 volt logic then Rin = (5 - 1.5) / 0.016 = around 220 ohm. We must also check that the logic pin can supply this current else we use a small transistor driver.
Output Side and Gate Drive
Now we see that the MOSFET or IGBT has some gate charge Qg. The HCPL3120 must give enough current to charge and discharge that gate quickly. We can roughly check the gate charge time using
tcharge = Qg / IdriveIf the Qg is 60 nC and the driver can give 2 ampere then tcharge is around 30 ns. In practice the gate resistor and internal resistance will increase this a bit.
We also calculate the external gate resistor. This resistor is used to slow down a bit to avoid ringing and EMI. The total RC time is
τ = (Rg + Rinternal) * CgateAnd Cgate is approximately Qg / Vgate. For example Qg = 60 nC and Vgate = 15 V then Cgate ~ 4 nF. If Rg = 5 ohm and internal ~1 ohm then τ = 6 * 4 nF = 24 ns.
We also check the average current for charging and discharging the gate
Iavg = Qg * fswIf fsw = 20 kHz and Qg = 60 nC then Iavg = 1.2 mA which is very low but the peak current is 2 A.
Timing
We see that the propagation delay is around 135 ns for turn on and turn off. The rise and fall is around 100 ns each. So if we want dead time in a half bridge then we must add these delays plus some margin.
Isolation and Safety
We know that the isolation voltage is 3750 Vrms and it is approved by UL1577. The J312 version can allow higher working voltage. When we design the PCB then we must keep proper creepage and clearance.
Common Mode Transient Immunity
This device can tolerate very fast voltage changes up to 15 to 25 kV per microsecond without false triggering. But we still keep our layout tight and do not let input traces run close to noisy power output to avoid coupling.
Application Guidelines
Always put one 0.1 µF ceramic and one 1 µF bypass capacitor close to VCC and GND of output side. Keep the gate driver loop very short. Also add the series gate resistor near the gate pin. Never route input side and output side traces close to each other.
Example Calculation
Suppose we drive an IGBT of Qg = 80 nC at 15 V and we use Rg = 10 ohm and frequency 25 kHz. Then
Cgate = 80 nC / 15 V ≈ 5.33 nF
τ = (10 + 1)5.33 nF ≈ 58.6 ns
Energy per transition ≈ 0.5CV^2 ≈ 0.6 µJ
Power = 0.6 µJ2*25 kHz ≈ 30 mW
Then the LED resistor for 5 V logic and 16 mA is around 220 ohm.
PCB Tips
Please keep input and output separate and floating if isolation is used. Place bypass capacitor very close. Add gate resistor to stop ringing. Keep dead time in the controller to stop shoot through. Keep input trace away from high dv/dt node.
Variants
HCPL3120 and J312 differ in LED material and isolation. HCNW3120 is for higher isolation voltage.
Failure Modes and Protection
The UVLO will stop gate drive when supply is low. We must take ESD care. The device normally dissipates low heat but we ensure proper bypass and short gate loop to avoid stress.
Application Circuit (Isolated Half Bridge Driver)

We now look at the diagram and we see that at the left side we have the control input. It is coming from maybe a open collector logic IC which can pull low when the input signal is applied. This logic output is connected to the LED input pins 2 of the HCPL-3120 and feed a logic control signal +5 V.
So we now see that when the control input goes high then the open collector will conduct to ground and then the LED inside HCPL-3120 will get current and it will emit light. When there is no input then the open collector is off and the LED is off.
Inside the HCPL-3120 block we can see that the LED light is received by the optical detector and the driver circuit. We see that the pink section shows the isolation barrier between the input side and the output side.
The output section has a totem-pole driver which drives pins 6 and 7. The output side has its own floating supply VCC = 18 V as shown in the diagram.
We also see that across VCC and GND at pins 8 and 5 there is a 0.1 µF capacitor. This capacitor is the local decoupling to provide fast current during gate switching.
Then from the driver output pin 6 there is an Rg resistor to the gates of the MOSFET or IGBT (Q1 and Q2). This resistor limits the gate current and controls the switching speed to reduce EMI and prevent oscillation.
On the right side we now see the two transistors Q1 and Q2 arranged like a half-bridge or totem pole. The load is connected from the mid-point of the two transistors to the 310 V DC supply.
Across each transistor we also see diodes which are the body diodes of MOSFETs or free-wheeling diodes of IGBTs to allow current in the opposite direction during switching transitions.
So the working is like this.
When the control input is LOW then the LED is off and the output of HCPL-3120 is low. That means the gate of the MOSFETs or IGBTs is pulled down through the driver and the transistors Q1 and Q2 are off. The load then sees no current flow.
When the control input is HIGH then the open collector pulls low, LED current flows, the internal detector activates, and the HCPL-3120 output goes high.
The 18 V supply now drives current into the gate through Rg and charges the gate capacitance. The MOSFETs or IGBTs turn on and connect the 310 V DC to the load.
The 0.1 µF capacitor ensures the driver can supply the high peak current to the gate without the supply voltage sagging. The isolation inside the HCPL-3120 allows the logic side to stay at 5 V and the power side to float at high voltage without any direct connection.
So we can now see that this diagram is a typical isolated gate driver configuration where a low voltage control signal safely drives high voltage switching devices using the HCPL-3120 opto coupler with built-in totem-pole driver and UVLO feature.
No Bootstrapping Capacitor or Diode Required
We first see that in many half bridge circuits when we want to drive the high side MOSFET then the source terminal of that MOSFET is not fixed to ground but it keeps moving up and down with the switching.
So if we try to give gate voltage from a fixed ground referenced driver then it will not work because the gate needs to be always higher than the source by around 10 to 15 volt for turn on.
So in that case people use bootstrap capacitor and diode method where they charge the capacitor when the low side MOSFET is on, and then when the high side needs to be on the capacitor provides that extra gate voltage above the moving source node.
But now in our present circuit we see that we are using HCPL-3120 opto driver which is an isolated driver. That means the output side supply of 18 V is totally floating and it does not share ground with the logic side.
The negative pin of that 18 V supply is connected directly to the emitter or source of the high side device Q1. So the driver output is referenced locally to the high side device source itself.
This way when the source of Q1 jumps up to the full bus voltage, the driver’s floating supply also jumps with it because its negative terminal is tied there.
Still it keeps giving the correct Vgate-to-source difference of around 18 V because the whole driver output stage is riding on top of that source potential.
So we do not need any bootstrapping here because our floating 18 V supply is permanently giving the required voltage difference to the high side gate without depending on any low side conduction period.
The opto isolation allows us to feed control signal to this floating driver without any electrical link, so the 18 V supply can stay at any potential the high side source is at.
That is why here we just put a small decoupling capacitor of 0.1 µF across VCC and GND pins of the driver to handle switching current peaks and we do not require a bootstrap capacitor and diode arrangement.
Conclusion
Finally note that for using this driver we always select correct variant, design LED resistor, give proper VCC with bypass, choose gate resistor carefully and ensure the timing and layout are done properly. Then the HCPL3120 or J312 will drive MOSFET or IGBT efficiently with isolation and safety.
Reference:


Comments
top my friend and to trigger the other Mosfet in case I will need another 3120 as it would look you have a scheme
Thank you Carlos, yes, one opto-coupler will be separately needed for each MOSFET to make them 100% isolated, and working independently and flawlessly…
Здравствуйте, поделитесь пожалуйста печатной платой в Лоу формате очень нужно, заранее спасибо